Module 3 Lab 3 - Basic Interface Configuration
You are a network engineer tasked with configuring a new switch. The switch will be connected to a few devices such as servers and workstations. To enable communication between these devices, you need to configure basic interface settings on the switch. This involves configuring IP addresses, setting port speeds, and bringing the port up to ensure it is active. Your goal is to configure the interfaces on the switch so that all devices can communicate with each other seamlessly
- Step 1: Check the default port settings.
Log in to the switches (SW1, SW2) using the default credentials, use the Klish CLI and view the port settings.
- Step 2: Check portgroup
Please verify if there is a port group configured on the switches. If a port group exists, please check how many ports belong to the group and what speeds are supported by the group.
- Step 3: Set the port speed to 10G
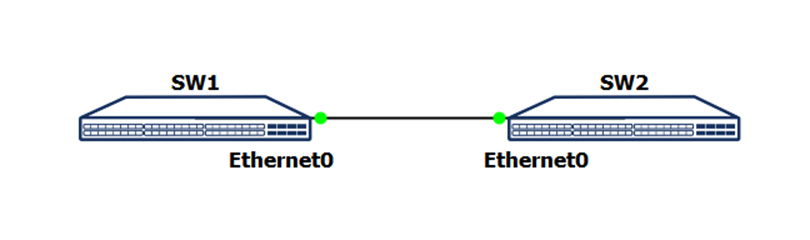
Set the speed of the Ethernet0 port to SW1 and SW2 to 10G.
- Step 4: Set the IP address and enable the ports.
Configure the IP address on Ethernet0 port of SW1 device to 1.0.0.1 with subnet mask 255.255.255.0. Similarly, configure the IP address on Ethernet0 port of SW2 device to 1.0.0.2 with subnet mask 255.255.255.0
- Step 5: Check that everything is working using the PING command.
Use the ping command to mutually ping the devices SW1 and SW2
- Default credentials: admin / YourPaSsWoRd
- Some platforms (mainly 25G switches) require a group of ports to have the “same” speed (1G/10G or 25G)
- Our switch has a portgroup of 4 ports each i.e. Ethernet0-3, Ethernet4-7 etc.
- In SONiC, the subnet mask 255.255.255.0 is represented in the format of x.x.x.x/24. This is because the number 24 represents the number of bits set to 1 in the subnet mask, which is equivalent to 255.255.255.0 in dotted decimal notation.